Thursday 4 June 2015
DIY SKINCARE RECIPES
For beautiful glowing skin, look no further than your pantry and refrigerator.
Purvi Desai from Zaaina Skincare has written some basic skincare recipes for us to try.
The Breakfast Mask
1 egg yolk
1 tablespoon of honey
1 tablespoon of olive oil
1/2 cup of oatmeal.
Mix all together. if you want to use the food processor to make it more creamy go ahead.
-Apply on the face and leave it on for 15-20 minutes.
-Wash it off with warm water.
Cucumber & Apple Cider Toner
1/2 cup of apple cider
2 small cucumber
Mix well in the blender
Apply on a clean face & neck with the cotton ball
Leave on for 20 minutes
Rinse off
Tomato + Sugar = Fabulous Skin Glow
(1) Cut a slice of a tomato.
(2) Sprinkle 2-3 TBSP sugar on a plate, dip the slice in it.
(3) Scrub the sugar dipped tomato all over the face in a circular motion.
(4) Leave the scrub on for 15 minutes and wash it off.
Reduce Age Spots with Onion & Apple Cider Vinegar
1. Finely chop an onion and using cheese cloth or strainer extract the juice.
2. Mix one part onion juice with one part apple cider vinegar.
3. Using cotton ball apply the mixture to the age spots.
4. do it once a day.
5. Leave it on for 30 minutes & wash it off.
Thursday 2 April 2015
2015 Mother's Day Gift Ideas
We all start our life in the same way, as a fragile treasure seed that needs to be nurtured
with love so we can bloom.
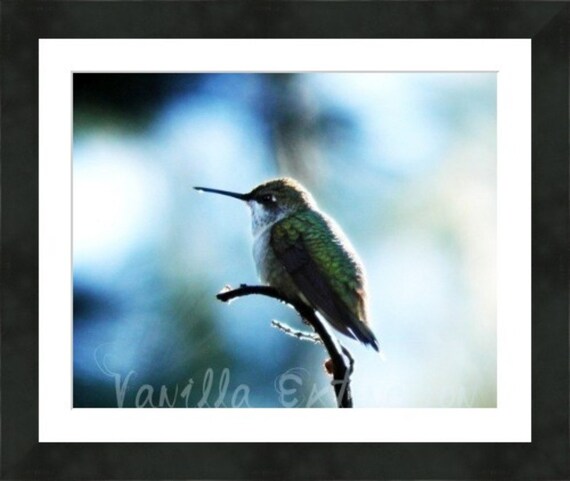
And what better day to say thanks to those wonderful souls that protected us to become who we are than starting the hunt for the perfect gift. Mother's Day brings us obvious remembrances. The post cards we used to make in elementary school that were precious and valued present for our mother. And somehow before we could understand we got caught in the rush of the years and no more gorgeous art or crafts for mom, we were just too busy trying to grow up. To think in those years brings me really beautiful memories, my strongest memories are aromas, and yes, as a perfumers that is really obvious, but I was just amazed the day Krista Miller of Kolor by Krista shared this photo with me. It wasn’t a mother and a baby, it wasn’t a warm cozy kitchen filled with Vanilla coming out of the oven, but yet Michelle from VanillaExtinction captured that precise moment of happiness and love that I used to feel, and I still do when my mother is nearby, this photo is the perfect metaphoric portrait of my mother.

My mother is a wonderful woman that somehow, even when the years pass by, she manages to retain a childlike quality on her, making her one of the most fun people to be with. Maybe because she was so young when she became a mother, she gave me a magical childhood. She used to take my brother and I to the parks looking for hummingbirds or just walking in the city for hours just telling us stories while my dad was working and studying in university at night time to finish his degree. We felt like the luckiest kids in the world.

With the years came the distance when I flew to the other side of the world trying to build up my own world, without knowing that my biggest freedom and treasure was to be found the day I came back to my mother’s house and my adorable mother was there waiting for me, right by her kitchen window overlooking at the garden and with a fresh cup of coffee and unconditional love.

The biggest lesson my mother gave me was that no matter the circumstances we can be happy. There is always a little sunshine waiting for us, always a comforting hug. She taught me to believe in miracles and to have always faith in the future, faith in Human beings, Faith in God, and to always, always have faith in myself.
But still, with all this appreciation I never seemed to have the time to write a simple lovely note for my mother. Then the magic came back, and the sparkle of Etsy came in place when I did discover that I still could send a beautiful handmade card to say, “Hi mom, I love you”.
I kept looking for the last days for a present for my mother, there is so many wonderful options that is really hard to decide.
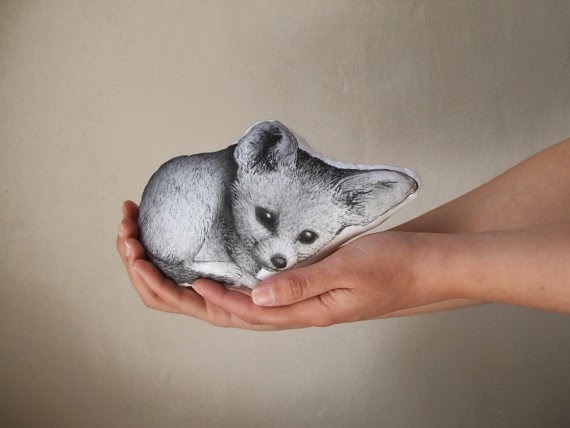
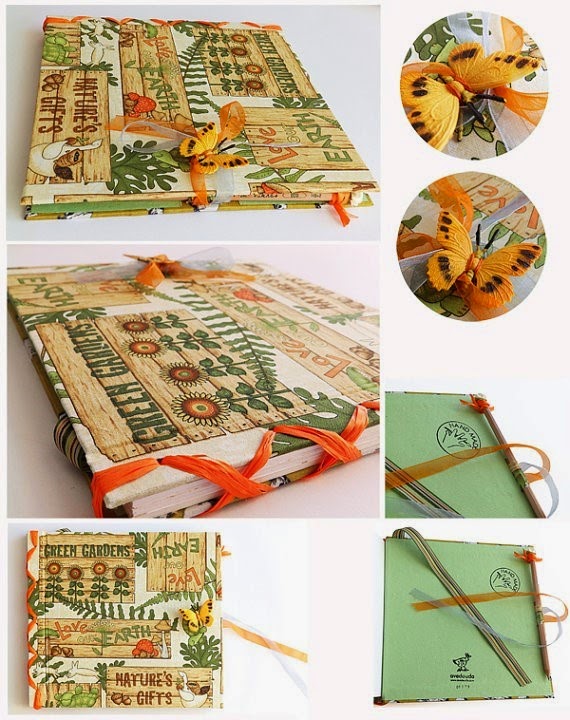
My mother is really unique, in the middle of the city she has an organic vegetables garden, she is hilarious, she always forgets everything, so, an adorable notebook like the ones that Alexandra makes for Avedouda will be a really nice way to keep memories and lists on place.
So dear friends, today is the time to explore and to pay tribute our live’s givers. Here are some ideas for you to start the journey.
Enjoy it and keep Faith, Future is wonderful, waiting for you, and all that thanks to the woman that carried us in her belly for months.
Wine:
www.etsy.com/listing/226057039
www.etsy.com/listing/214864702
www.etsy.com/listing/177477084
www.etsy.com/listing/224403012
Coffee/Tea:
www.etsy.com/listing/217582868
www.etsy.com/listing/217986080
www.etsy.com/listing/227045095
Art:
www.etsy.com/listing/195361701
www.etsy.com/listing/219628814
www.etsy.com/listing/193571021
www.etsy.com/listing/208648094
www.etsy.com/listing/125902493
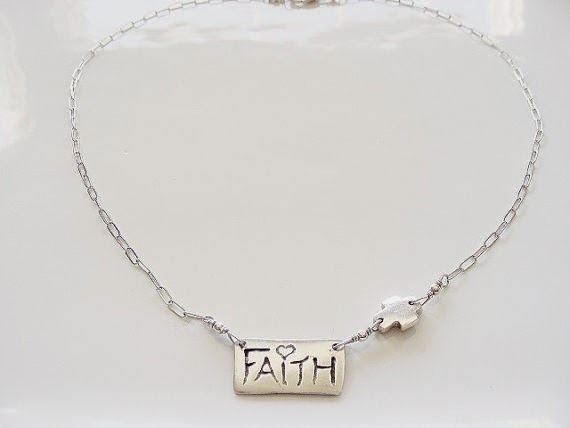
Jewelry:
www.etsy.com/listing/163706087
www.etsy.com/listing/221095972
www.etsy.com/listing/181254790
www.etsy.com/listing/217181883
www.etsy.com/listing/117485600
www.etsy.com/listing/209817828
www.etsy.com/listing/226418370
Other:
www.etsy.com/listing/224523527
www.etsy.com/listing/214912424
www.etsy.com/listing/223639389
www.etsy.com/listing/218288765
www.etsy.com/listing/221406294
www.etsy.com/listing/220050403
www.etsy.com/listing/124795898
www.etsy.com/listing/50974697
And what better day to say thanks to those wonderful souls that protected us to become who we are than starting the hunt for the perfect gift. Mother's Day brings us obvious remembrances. The post cards we used to make in elementary school that were precious and valued present for our mother. And somehow before we could understand we got caught in the rush of the years and no more gorgeous art or crafts for mom, we were just too busy trying to grow up. To think in those years brings me really beautiful memories, my strongest memories are aromas, and yes, as a perfumers that is really obvious, but I was just amazed the day Krista Miller of Kolor by Krista shared this photo with me. It wasn’t a mother and a baby, it wasn’t a warm cozy kitchen filled with Vanilla coming out of the oven, but yet Michelle from VanillaExtinction captured that precise moment of happiness and love that I used to feel, and I still do when my mother is nearby, this photo is the perfect metaphoric portrait of my mother.
My mother is a wonderful woman that somehow, even when the years pass by, she manages to retain a childlike quality on her, making her one of the most fun people to be with. Maybe because she was so young when she became a mother, she gave me a magical childhood. She used to take my brother and I to the parks looking for hummingbirds or just walking in the city for hours just telling us stories while my dad was working and studying in university at night time to finish his degree. We felt like the luckiest kids in the world.
With the years came the distance when I flew to the other side of the world trying to build up my own world, without knowing that my biggest freedom and treasure was to be found the day I came back to my mother’s house and my adorable mother was there waiting for me, right by her kitchen window overlooking at the garden and with a fresh cup of coffee and unconditional love.
The biggest lesson my mother gave me was that no matter the circumstances we can be happy. There is always a little sunshine waiting for us, always a comforting hug. She taught me to believe in miracles and to have always faith in the future, faith in Human beings, Faith in God, and to always, always have faith in myself.
But still, with all this appreciation I never seemed to have the time to write a simple lovely note for my mother. Then the magic came back, and the sparkle of Etsy came in place when I did discover that I still could send a beautiful handmade card to say, “Hi mom, I love you”.
I kept looking for the last days for a present for my mother, there is so many wonderful options that is really hard to decide.
My mother is really unique, in the middle of the city she has an organic vegetables garden, she is hilarious, she always forgets everything, so, an adorable notebook like the ones that Alexandra makes for Avedouda will be a really nice way to keep memories and lists on place.
So dear friends, today is the time to explore and to pay tribute our live’s givers. Here are some ideas for you to start the journey.
Enjoy it and keep Faith, Future is wonderful, waiting for you, and all that thanks to the woman that carried us in her belly for months.
Wine:
www.etsy.com/listing/226057039
www.etsy.com/listing/214864702
www.etsy.com/listing/177477084
www.etsy.com/listing/224403012
Coffee/Tea:
www.etsy.com/listing/217582868
www.etsy.com/listing/217986080
www.etsy.com/listing/227045095
Art:
www.etsy.com/listing/195361701
www.etsy.com/listing/219628814
www.etsy.com/listing/193571021
www.etsy.com/listing/208648094
www.etsy.com/listing/125902493
Jewelry:
www.etsy.com/listing/163706087
www.etsy.com/listing/221095972
www.etsy.com/listing/181254790
www.etsy.com/listing/217181883
www.etsy.com/listing/117485600
www.etsy.com/listing/209817828
www.etsy.com/listing/226418370
Other:
www.etsy.com/listing/224523527
www.etsy.com/listing/214912424
www.etsy.com/listing/223639389
www.etsy.com/listing/218288765
www.etsy.com/listing/221406294
www.etsy.com/listing/220050403
www.etsy.com/listing/124795898
www.etsy.com/listing/50974697
Saturday 7 March 2015
Button Wall Art Tutorial
Hello, everyone! I'm Krista, the owner of Kolor By Krista, where I create fun and colorful crocheted accessories and home decor.
Everyone loves a fun little craft to add a nice pop of color to their home! This one can be used in any room, from your living room to your bathroom! I have seen pictures of these button-art signs all over, but have struggled to find a tutorial I really like. These specific instructions are for the LOVE sign shown below, but they can be easily modified for any design you’d like!

Supplies:

- Canvas(es) – any size will do! Pick your design and then pick your canvas size. This project uses four 5″ x 7″.
- Fabric – you don’t want anything too busy. The black and white one I chose is a bit much, but I don’t mind it.
- Buttons – I got my buttons at Joann. They are a little spendy for buttons, but there was a 30%-off sale at the time. (anyone have a better place to buy them?)
- Hot glue gun – or some other way to attach buttons to fabric
- Extra hot glue sticks – I used 3 between my two projects
- Iron
- Staple gun – or some other way to attach your fabric to your canvas
- Scissors
- Tape
Step 1: Print design
For my heart canvas, I just found a heart picture I liked on Google and printed it off.
For the LOVE sign, I opened up PowerPoint and sized my slides to my canvas size (5″ x 7″). You will want to be sure that your slide size matches your canvas size so you can clearly see what your design will look like on your canvas.
I then put a textbox with the word “love” in all capital letters on one slide and chose a nice, yet simple font (Cooper Black). After I was happy with how it looked I deleted the word “love” and created four slides, with one letter on each, and printed them.
Note that you may need your letters to be slightly different font sizes to make them fit. Here are the font sizes I used for this example:
- L – 450
- O – 440
- V – 425
- E – 450.
Here’s what you should have (minus the part where I forgot to take a picture before starting to cut).

Step 2: Cut design
Now it’s time to cut out your shape outlines, cutting right on the line. You will be using the white part of the paper, not the printed part. If you have a letter like “O” or “B”, make sure you save the inside parts of the letter as well.

Step 3: Iron fabric
When ironing, remember that it doesn't have to be absolutely perfect. If there are stubborn wrinkles that you can’t get out you can always be sure to pull your fabric extra tight when attaching it to the canvas. I used steam on mine to get it to cooperate a bit more.

Step 4: Cut fabric
Now it is time to cut out your fabric. Unless your craft store is super careful, your fabric probably won’t be perfectly straight, but that is just fine, it doesn't need to be perfect as you can see from my pictures.
Place your canvas in a corner of the fabric and cut around it, leaving about 1″ on each side.


Step 5: Attach fabric to canvas
Place your fabric on top of your canvas. Do your best to make sure there is an even amount of fabric hanging off of each side. But more importantly, make sure that the fabric design is straight. Even if it means that the fabric is sitting crookedly.

Flip the canvas over and staple the first two sides down. I used 3 staples per side.
Note: If you have fabric hanging over the wooden part of the canvas, trim it a little more. Extra fabric hanging over will make them hard to hang on the wall because your hook/nail will get stuck on the fabric instead of the wood.

The remaining two sides are a little trickier, but not bad. Especially if you wrap presents! Fold the corners up just like you would when wrapping a present.
First, fold the top down.

Then, pull the triangle on the edge in towards the canvas.

And lastly, fold the edge of your fabric that is touching the table up onto the top of the canvas and staple it down.

Repeat for the other corner and add an extra staple in the middle for good measure.
It should look like this once you have all four sides attached.

Flip it over and TADA!!
Repeat for any extra canvases you have.

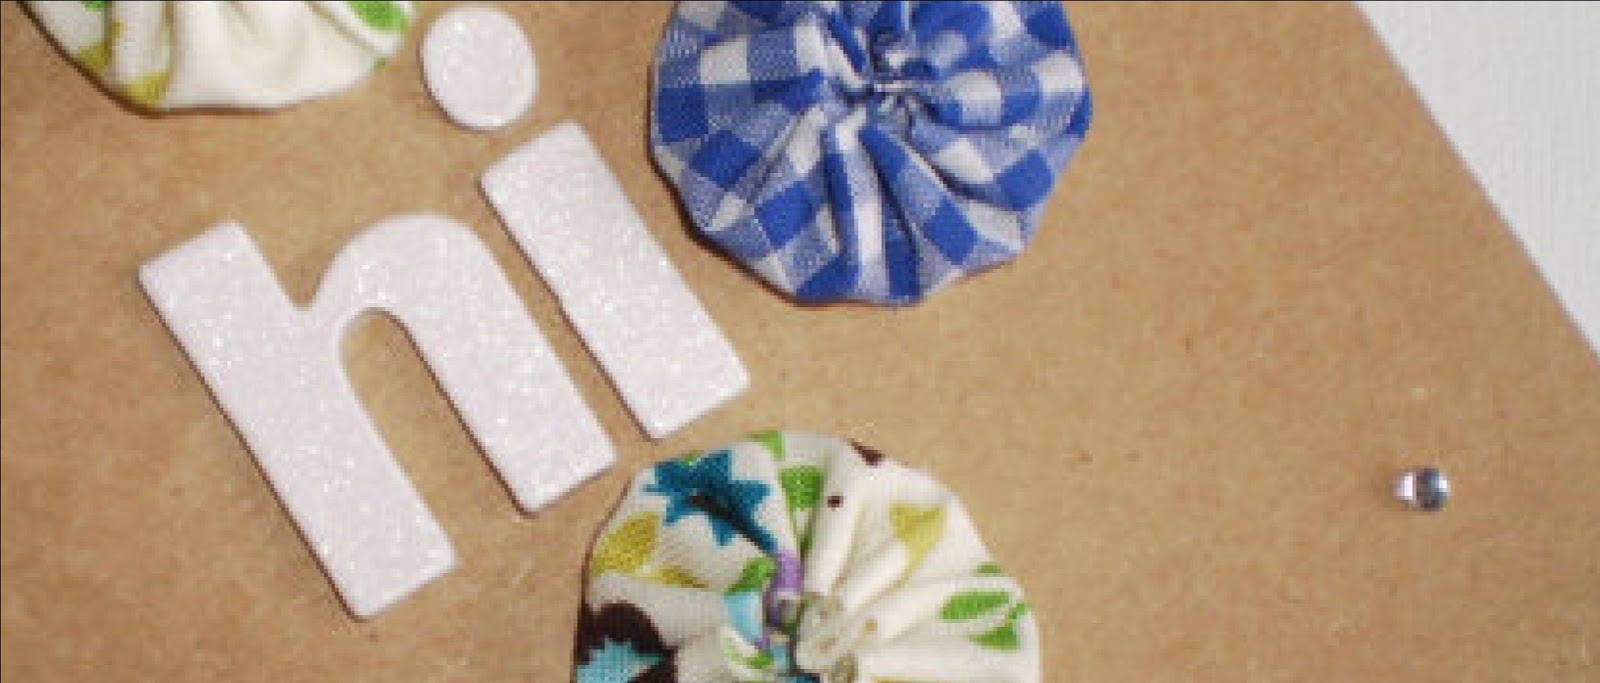
Step 6: Tape outline to the canvas.
Be sure to get it straight and centered! I cut my letters down as much as I could because it was hard to tell if things were lined up with a big piece of paper flopping around.

Remember to include the middle pieces, if needed.

Step 7: Add buttons!
This is where it gets fun, if you like puzzles like I do! I started with the smallest parts of each letter first. I would lay out a few buttons to make sure to get a good fit and then glue them down.
This is what I laid out before doing any gluing.

Then, just continue until your design is covered with buttons! I highly recommend laying buttons out in groups before gluing them down. You don’t want to glue a couple and then find that you don’t have any buttons that fit the spaces that are left between the design’s edges or other buttons.
Here’s what my “L” looked like when I was finished.

And my “O”.

Step 8: Remove the paper to see your masterpiece!
Here’s what my “L” looked like. As you can see, the bottom is a little crooked. This happened because I was too worried about keeping the buttons inside the lines! I should have let them expand outside the bottom-left edge so I could make a straight line. At first I didn't care, but I later went back and pulled those buttons off so I could fix it.

Repeat steps 6-8 for any additional canvases you have and that’s all there is too it!

It is definitely time-consuming, but it isn't difficult! A great lazy Sunday afternoon project.
Thanks for that wonderful tutorial Krista.
Find out more about our team here
Thanks for that wonderful tutorial Krista.
Find out more about our team here
FEATURING MICHELE
Meet Michele, a talented photographer from VanillaExtinction.
"Absolutely stunning! I feel like I can smell the gardenia"
"a true artist`s eye for beauty"
"Intense and beautiful--you can see the cat 'magic' in those eyes"
Just a few things customers have said about Michele`s work.
Let`s talk to the woman behind the lens.
What motivated you to start your shop?
In 2009 I went through a major depressive episode that lasted for months. I had no trigger for it. It just happened. I kept it to myself until the time when I realized that I needed help and support or I was not going to survive. Anyway, after I began to feel better I bought myself a $100 point and shoot camera and the rest, as they say, is history. I fell head over heels in love with photography! I shared my photos with family and was getting such positive feedback which, in turn, fuelled my passion. My wonderful daughter, Kelly, started to encourage me to start an Etsy shop. I thought she was being foolish and just trying to bolster my well being and self esteem. She took it upon herself to start the wheels of Vanilla Extinction turning by doing all of the basic work of setting up shop and the rest is history.

What is your favourite item in your shop and why?
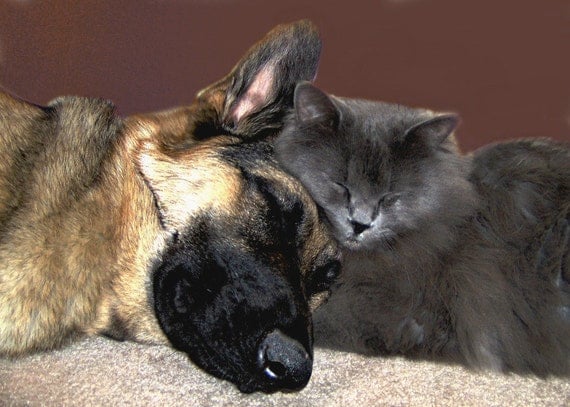
The items in my shop that mean the most to me are the photos of my dog and cat, India and Mikey. I have received the most amazing feedback from so many people in regards to the feelings some of these photos evoke and that is what, to me, photography is all about.

What inspires your work?
Evoking feelings. To hear someone tell me that they were brought to tears by one of my photos (and that has happened on a few occasions) is truly inspirational.
Why did you join this team?
I want to expand my horizons by working with others and create more than just photo prints. I feel that there is so much talent here on Etsy and that collaborating with other artists is going to be beneficial to me and to my customers.
What do you think is the most important thing needed to form a good collaboration?
Trust. Unfortunately, our society has people that are just waiting for the opportunity to take advantage of someone else's talent and good nature. I want to trust that whomever I may be collaborating with has the same ideals and trust for my art as I have for theirs and the longing to come up with something wonderful together.
What is the most daring thing you`ve ever done?
It depends on what you mean by daring. I have never jumped out of an airplane or swam with sharks but I have been a single mom of three young children.
Do you sell your work on any other sites or venues?
I sell my photography on a few other sites. I have four stores on Zazzle which allows me to use my photography on hundreds of different items. I have recently opened a store on Fine Art America and am in the process of filling it with my photography. And I have my own website as well.
Thanks Michele. I`m in awe of your talent.
What do you think? Tell us in the comments.
"Absolutely stunning! I feel like I can smell the gardenia"
"a true artist`s eye for beauty"
"Intense and beautiful--you can see the cat 'magic' in those eyes"
Just a few things customers have said about Michele`s work.
Let`s talk to the woman behind the lens.
What motivated you to start your shop?
In 2009 I went through a major depressive episode that lasted for months. I had no trigger for it. It just happened. I kept it to myself until the time when I realized that I needed help and support or I was not going to survive. Anyway, after I began to feel better I bought myself a $100 point and shoot camera and the rest, as they say, is history. I fell head over heels in love with photography! I shared my photos with family and was getting such positive feedback which, in turn, fuelled my passion. My wonderful daughter, Kelly, started to encourage me to start an Etsy shop. I thought she was being foolish and just trying to bolster my well being and self esteem. She took it upon herself to start the wheels of Vanilla Extinction turning by doing all of the basic work of setting up shop and the rest is history.
What is your favourite item in your shop and why?
The items in my shop that mean the most to me are the photos of my dog and cat, India and Mikey. I have received the most amazing feedback from so many people in regards to the feelings some of these photos evoke and that is what, to me, photography is all about.
What inspires your work?
Evoking feelings. To hear someone tell me that they were brought to tears by one of my photos (and that has happened on a few occasions) is truly inspirational.
Why did you join this team?
I want to expand my horizons by working with others and create more than just photo prints. I feel that there is so much talent here on Etsy and that collaborating with other artists is going to be beneficial to me and to my customers.
What do you think is the most important thing needed to form a good collaboration?
Trust. Unfortunately, our society has people that are just waiting for the opportunity to take advantage of someone else's talent and good nature. I want to trust that whomever I may be collaborating with has the same ideals and trust for my art as I have for theirs and the longing to come up with something wonderful together.
What is the most daring thing you`ve ever done?
It depends on what you mean by daring. I have never jumped out of an airplane or swam with sharks but I have been a single mom of three young children.
Do you sell your work on any other sites or venues?
I sell my photography on a few other sites. I have four stores on Zazzle which allows me to use my photography on hundreds of different items. I have recently opened a store on Fine Art America and am in the process of filling it with my photography. And I have my own website as well.
Thanks Michele. I`m in awe of your talent.
What do you think? Tell us in the comments.
Subscribe to:
Posts (Atom)